CLion is a powerful C/C++ IDE with advanced debugging, refactoring, and code analysis features. Developers who prefer JetBrains' workflow, or who already use the rest of its ecosystem, may find it convenient to work with LVGL in CLion, as long as they understand that official support, examples, and troubleshooting are centered on VSCode and Eclipse.
This guide covers setting up LVGL in CLion on Ubuntu 24.04 and Windows, including dependency installation, CMake configuration, and running or debugging the example application.
LVGL does not officially support CLion or other IntelliJ IDEs for LVGL development. The steps below have been tried out, and should work. If they don't, leave a comment, but you're more or less on your own.
The project used in both cases is the PC simulator port. Despite the eclipse in its name, it is a regular CMake project and needs no Eclipse tooling, which is exactly why CLion can work with it.
PC simulator project for LVGL embedded GUI Library. Recommended on Linux and Mac.
On Ubuntu 24.04#
Install prerequisites as described in the LVGL repository README#
The simulator needs a compiler, CMake, and SDL2 for the display window:
sudo apt install git build-essential cmake libsdl2-devClone the repository#
Either use the terminal:
git clone https://github.com/lvgl/lv_port_pc_eclipse.git
cd lv_port_pc_eclipseOr CLion's built-in Git support (File → New → Project from Version Control):
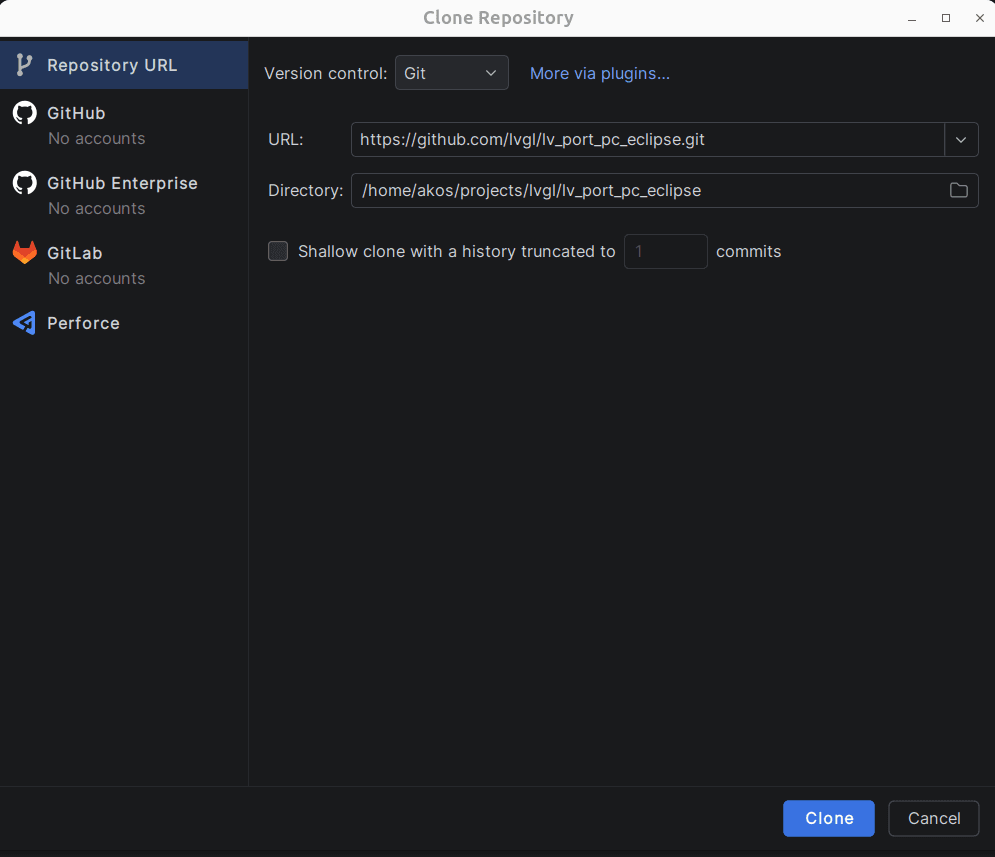
Open the project#
Open CLion and create a new project by selecting the cloned folder. When prompted, select the CMake project configuration. The defaults are fine here, since SDL2 comes from the system package installed above.
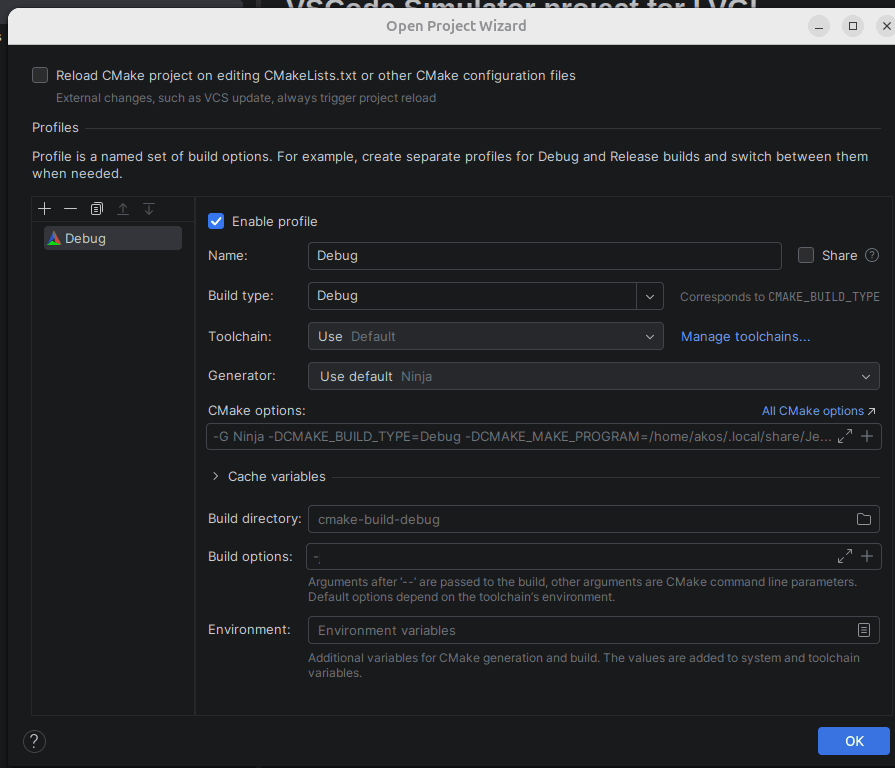
You are now ready to run or debug the application. You can use CLion's menu to launch the app, set breakpoints, and explore LVGL interactively.
On Windows#
Install prerequisites as described in the LVGL README#
Windows has no system package for SDL2, so it is installed through VCPKG, Microsoft's C++ package manager.
Install VCPKG:
git clone https://github.com/microsoft/vcpkg
cd vcpkg
.\bootstrap-vcpkg.batInstall SDL2:
.\vcpkg install sdl2Clone the repository#
Either use the terminal:
git clone https://github.com/lvgl/lv_port_pc_eclipse.git
cd lv_port_pc_eclipseOr CLion's built-in Git support (File → New → Project from Version Control):
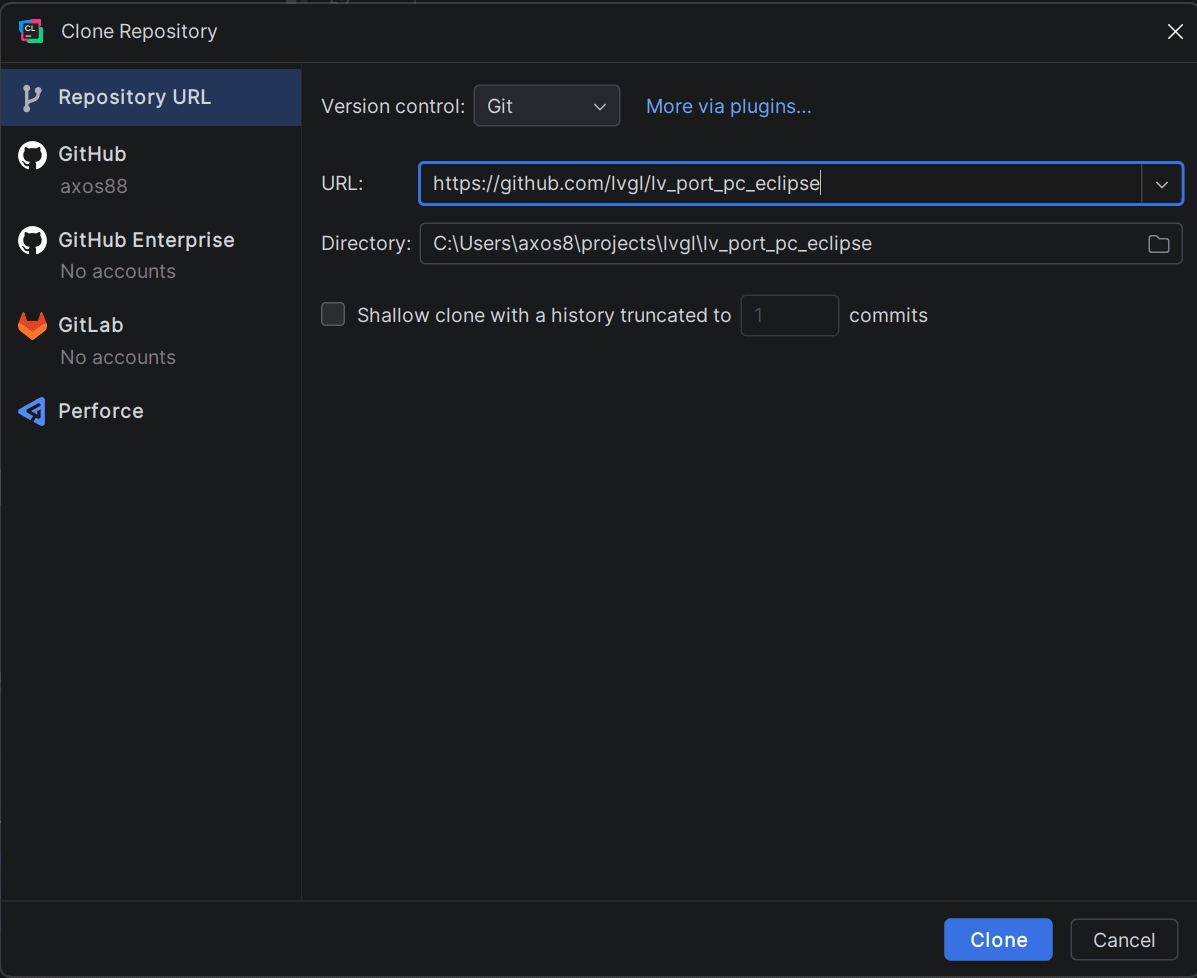
Open the project#
Open CLion and create a new project from the cloned folder. When prompted, select the CMake project configuration, and on the next screen add VCPKG as the CMake toolchain file. Without it, the build will not find SDL2.
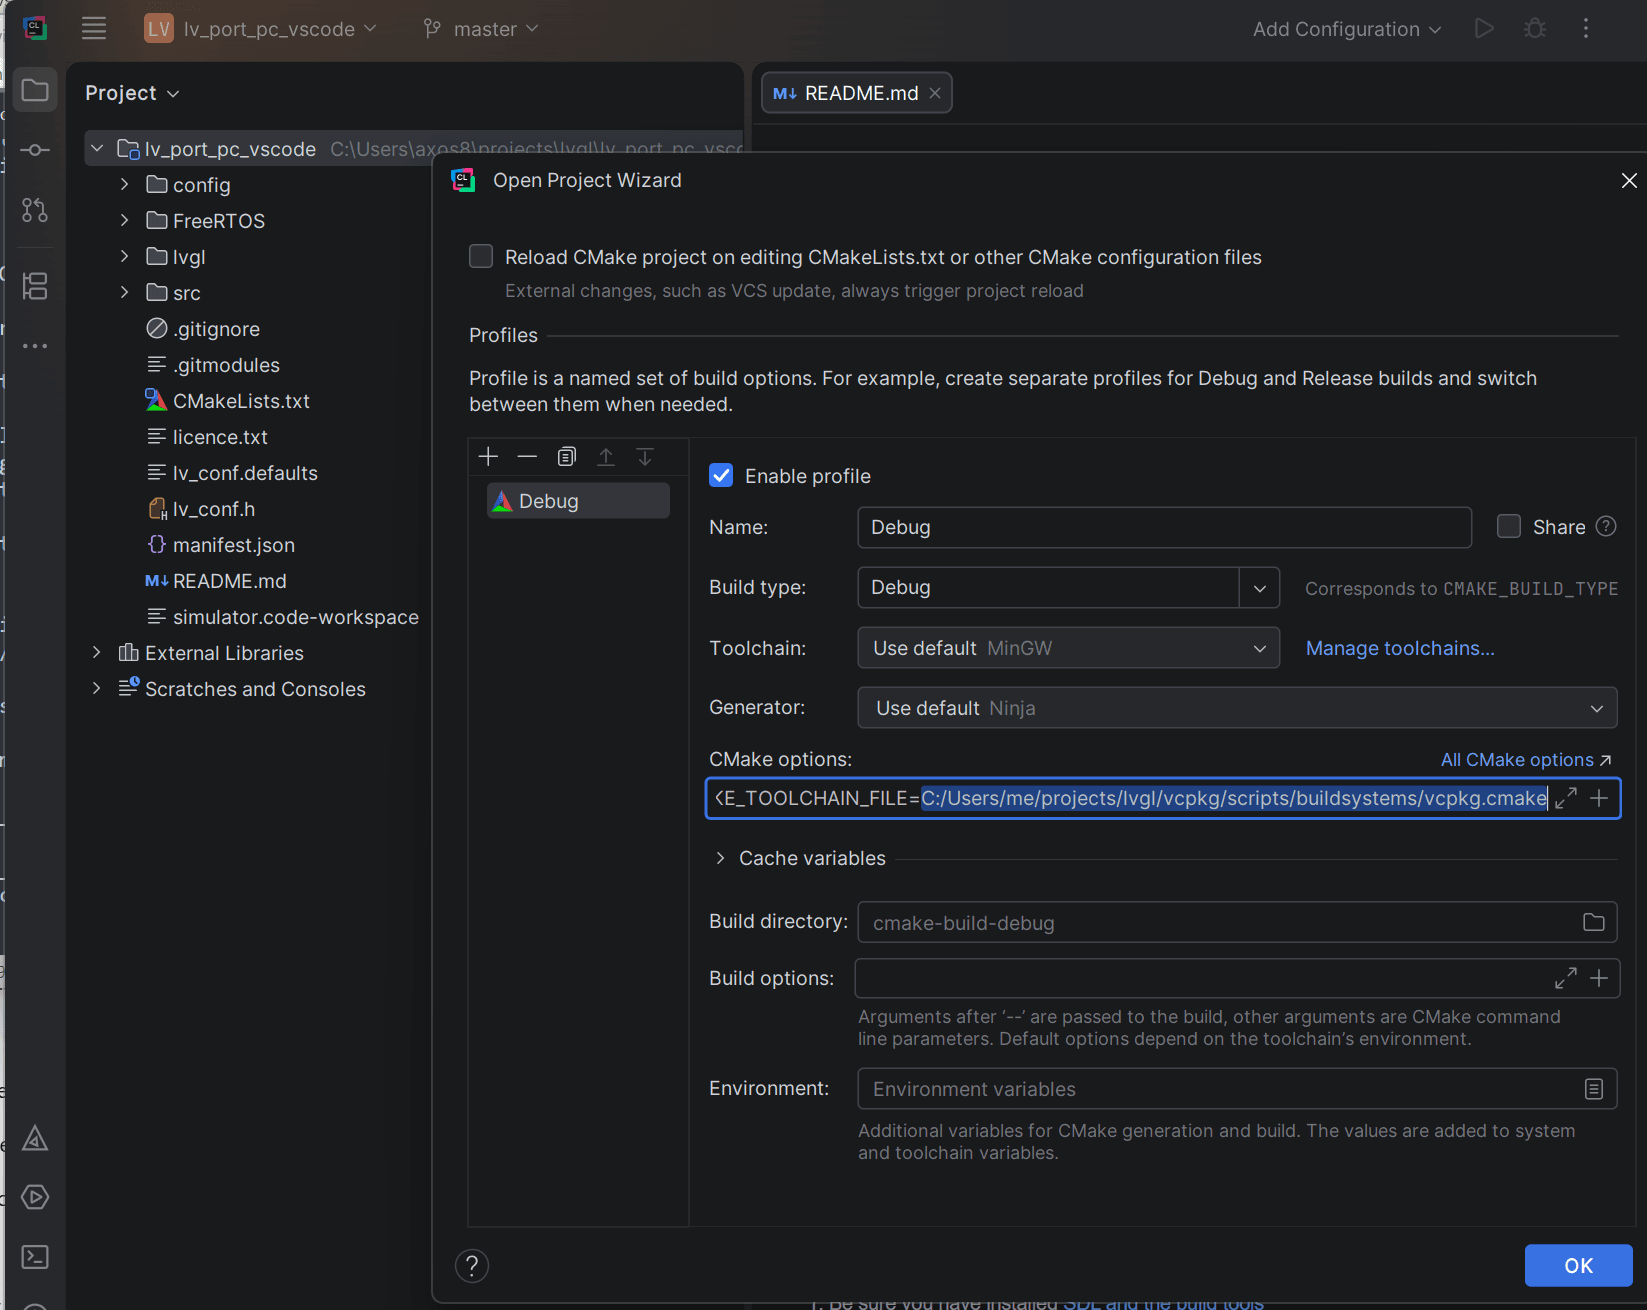
If you missed adding the toolchain file during project creation, you can add it later by navigating through File → Settings → CMake. Make sure to add the following line to the CMake options:
-DCMAKE_TOOLCHAIN_FILE=C:/path/to/vcpkg/scripts/buildsystems/vcpkg.cmakeIn my case that was:
-DCMAKE_TOOLCHAIN_FILE=C:/Users/akos/projects/lvgl/vcpkg/scripts/buildsystems/vcpkg.cmakeUse forward slashes in the path, and reload the CMake project afterwards so CLion picks up the new configuration.
You are now ready to run or debug the application. Breakpoints and interactive debugging work as expected.
Conclusion#
CLion's native CMake support makes it easy to develop and debug LVGL applications on both Ubuntu and Windows. For developers familiar with IntelliJ IDEs, it can be a practical alternative to VSCode or Eclipse, provided they understand that CLion is not officially supported.
Dependencies are handled via standard Linux packages or VCPKG on Windows, and once set up, you can explore LVGL code, experiment with widgets, and debug in CLion as you would in VSCode.