In this post I'll show you how I ported the Littlev Graphics Library (now LVGL) to an STM32F429 Discovery board. The porting was quite simple because the GUI library needs only a few interface functions. Although I'd never used STM32 microcontrollers before, the whole process took only half a day.
LVGL Demo on STM32F429 Discovery Board
Ready-to-Use Project#
You can download a ready-to-use project from GitHub: stm32f429_disco_no_os_sw4stm32
To clone with git:
git clone https://github.com/littlevgl/stm32f429_disco_no_os_sw4stm32.git --recurse-submodulesOr download the project as a zip file.
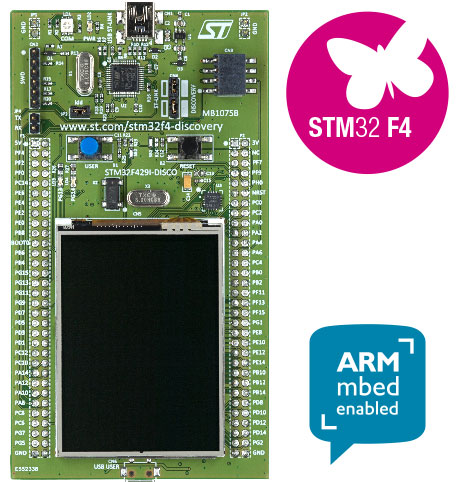
The Development Board#
Key features:
- Powerful STM32F429ZIT6 microcontroller with ARM Cortex-M4 core
- 2 MB Flash memory and 256 KB internal RAM
- 320×240, 2.4-inch QVGA TFT LCD with resistive touch pad
- 64 Mbit SDRAM (not required - internal RAM is sufficient for one frame buffer)
- LVGL doesn't require double buffering for high-level features like transparency, scrolling, or animations
- USB interface for firmware loading and debugging
Setting Up a New Project#
If you're not using the ready-to-use project, here's how to set up a new project from scratch.
Development Environment#
I started by searching for code examples and quickly found STM32CubeF4, ST's portable embedded software library that comes with many examples.
For an Eclipse-based IDE, I used SW4STM32. You'll need to register at openstm32.org to download the IDE. Installation was straightforward on Linux Mint, and the IDE is cross-platform (works on Windows and macOS as well).
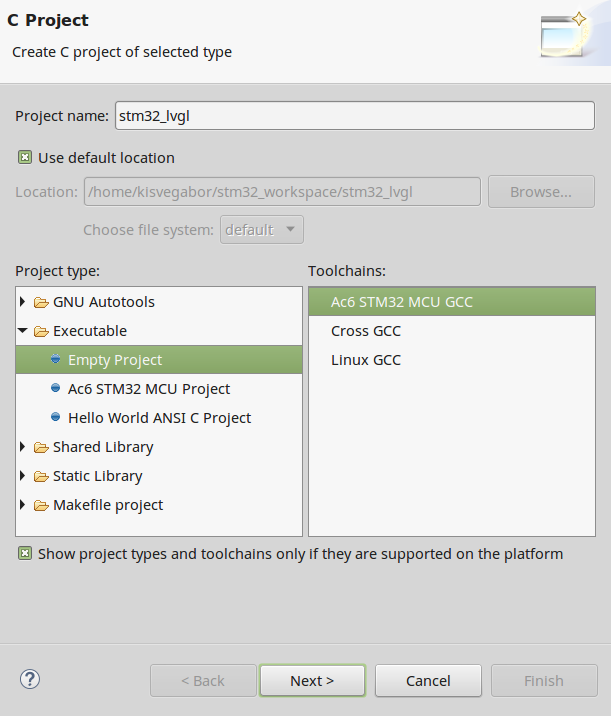
Creating the Project#
I reviewed some display-related examples from the STM32CubeF4 pack. In this MCU, the LCD controller module is called LTDC (LCD TFT Display Controller), and it features a graphics accelerator called Chrom-ART (also known as DMA2D).
To create a new project:
- Go to File → New → C Project
- Choose Empty project with Ac6 STM32 MCU GCC toolchain
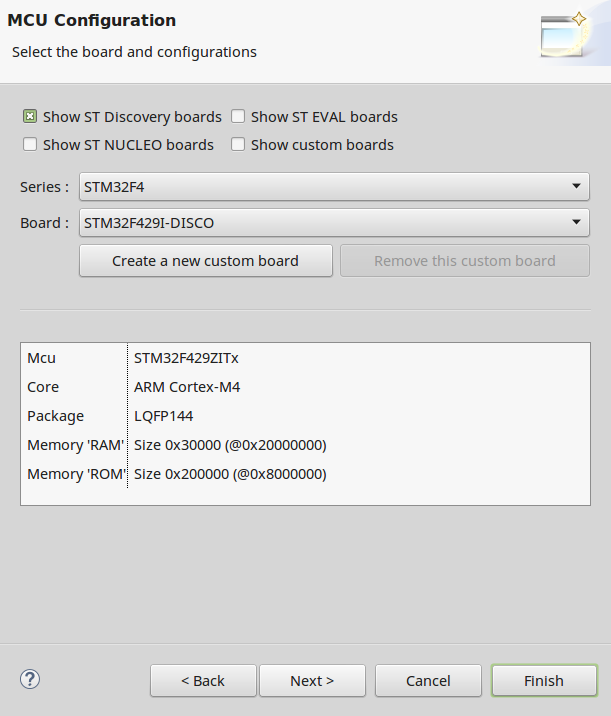
- Select your board type (STM32F429I-Discovery)
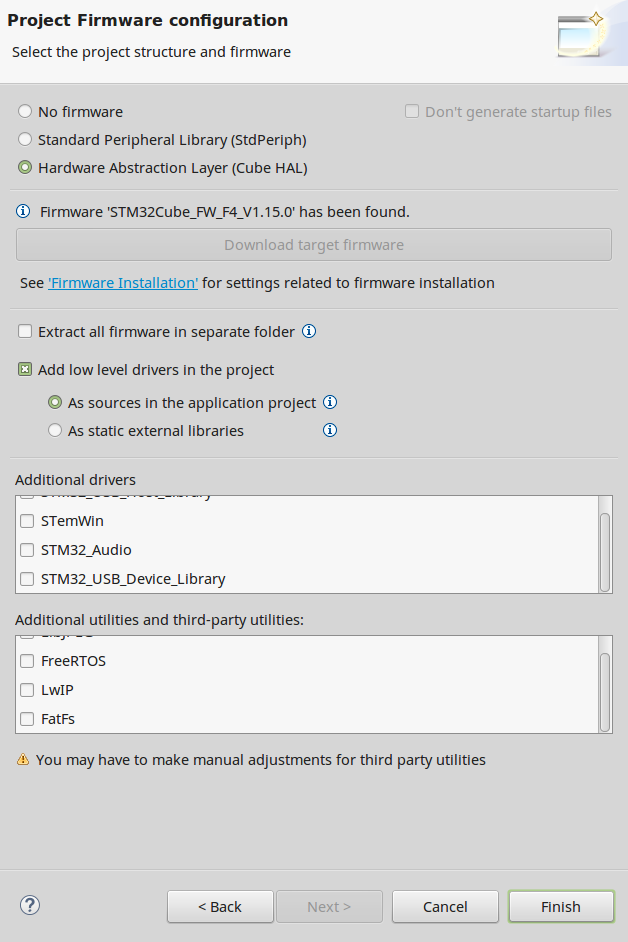
- Enable Cube HAL
- Click "Download target firmware" if the button is active
The result is a project with many folders and files. I was able to build this initial project without any warnings or errors.
Testing the Setup#
To test the development board, I wrote a simple LED blinker in the main function:
int main(void) {
    HAL_Init();
    BSP_LED_Init(LED3);

    while(1) {
        BSP_LED_Toggle(LED3);
        HAL_Delay(300);
    }
}Porting LVGL#
Adding the LVGL Repository#
Using a terminal, I cloned the lvgl repository from LVGL's GitHub page. From the project's root folder:
git clone https://github.com/littlevgl/lvgl.gitTo add the new directory, right-click on the project name in Eclipse and choose Refresh.
Configuration#
- Copy lvgl/lv_conf_templ.h next to the lvgl folder
- Rename it to lv_conf.h
- Remove the
#if 0at the beginning and its#endifat the end to enable the content
In lv_conf.h, I changed only:
LV_HOR_RES  240
LV_VER_RES 320Driver Implementation#
I created the drivers according to the example programs:
- Created hal_stm_lvgl folder
- Wrote display driver in tft.c
- Wrote touch pad driver in touchpad.c
- Added
lv_tick_inc(1)to src/stm32f4xx_it.c → SysTick_Handler()
In main.c, I called:
lv_init()tft_init()touchpad_init()
The project compiled successfully and loaded to the board.
Running the Demo#
Finally, I added the lv_examples repository and called demo_create(). This created the GUI shown in the video above.
Summary#
The STM32F429 Discovery board is a great, powerful, and low-cost development board that serves as an excellent starting point for your first GUI application. With LVGL, you can create modern and innovative graphical user interfaces. By following this guide, you can easily get through the first steps of your embedded GUI journey!