A student learns sensors in one place and screens in another. The sensor project reads a temperature and prints it to a serial monitor. The display project draws a slider that changes a number nobody is using. Both work. Neither one is a device.
The Gap Between Sensors and Screens#
Most display tutorials are widget tours. You place a button, style a label, wire up a slider, and every value behind them is invented. Nothing on the screen came from the hardware, so the interface only ever demonstrates the library.
The sensor side has the opposite problem. The readings are real and there is nowhere to put them. A finished project ends at a serial monitor, or at a web page served off the same board, which teaches networking rather than interface design.
So a student can finish a starter kit having done both halves and having connected neither. The screen is the part a person actually touches, and it is usually the last thing a student learns.
What Real Hardware Demands#
Wire a real sensor to a real screen and two things change.
The first is that the interface acquires requirements. An invented value updates whenever you like. A real one arrives at its own rate, sometimes late and sometimes wrong, and the screen has to have an answer for that. Deciding what to show while a reading is stale is a question a slider demo never has to ask.
The second is that the hardware starts pushing back, and a student can work out why with a calculator.
The display on the CYD board is 320 by 240 pixels. At 16-bit colour each pixel takes two bytes, so a full screen comes to about 150 KB. A student might be tempted to keep that whole screen in memory, draw into it, and hand it to the display when it is ready.
The ESP32 on this board will not allow it. The chip carries 520 KB of SRAM, but Espressif's memory documentation caps the amount a program can reserve up front at 160 KB, and this board carries no PSRAM, the extra memory chip some boards add, to fall back on. The screen alone would take almost all of that, and the WiFi stack, the touch driver, and the student's own code still have to fit somewhere.
LVGL does not have to keep the whole screen in memory. The display controller on the board already holds the pixels, so LVGL can work in pieces. It draws a small piece of the interface at a time into a draw buffer, sends that piece out over SPI, then reuses the same buffer for the next piece. The documentation suggests sizing the buffer at about a tenth of the screen, so roughly 15 KB does the work that 150 KB was going to. LVGL also keeps track of which parts of the interface changed, so pressing a button redraws the button and leaves the rest alone.
Once a student knows why the buffer has to be small, the rest of the interface follows from it. How much of the interface to keep loaded, when to redraw, whether an animation is affordable at all: on this board each of those has an answer, and the answer comes from the memory budget rather than from taste.
A desktop simulator has none of these limits, which is why the lesson only lands on the board itself.
Inside the CoreStack Kit#
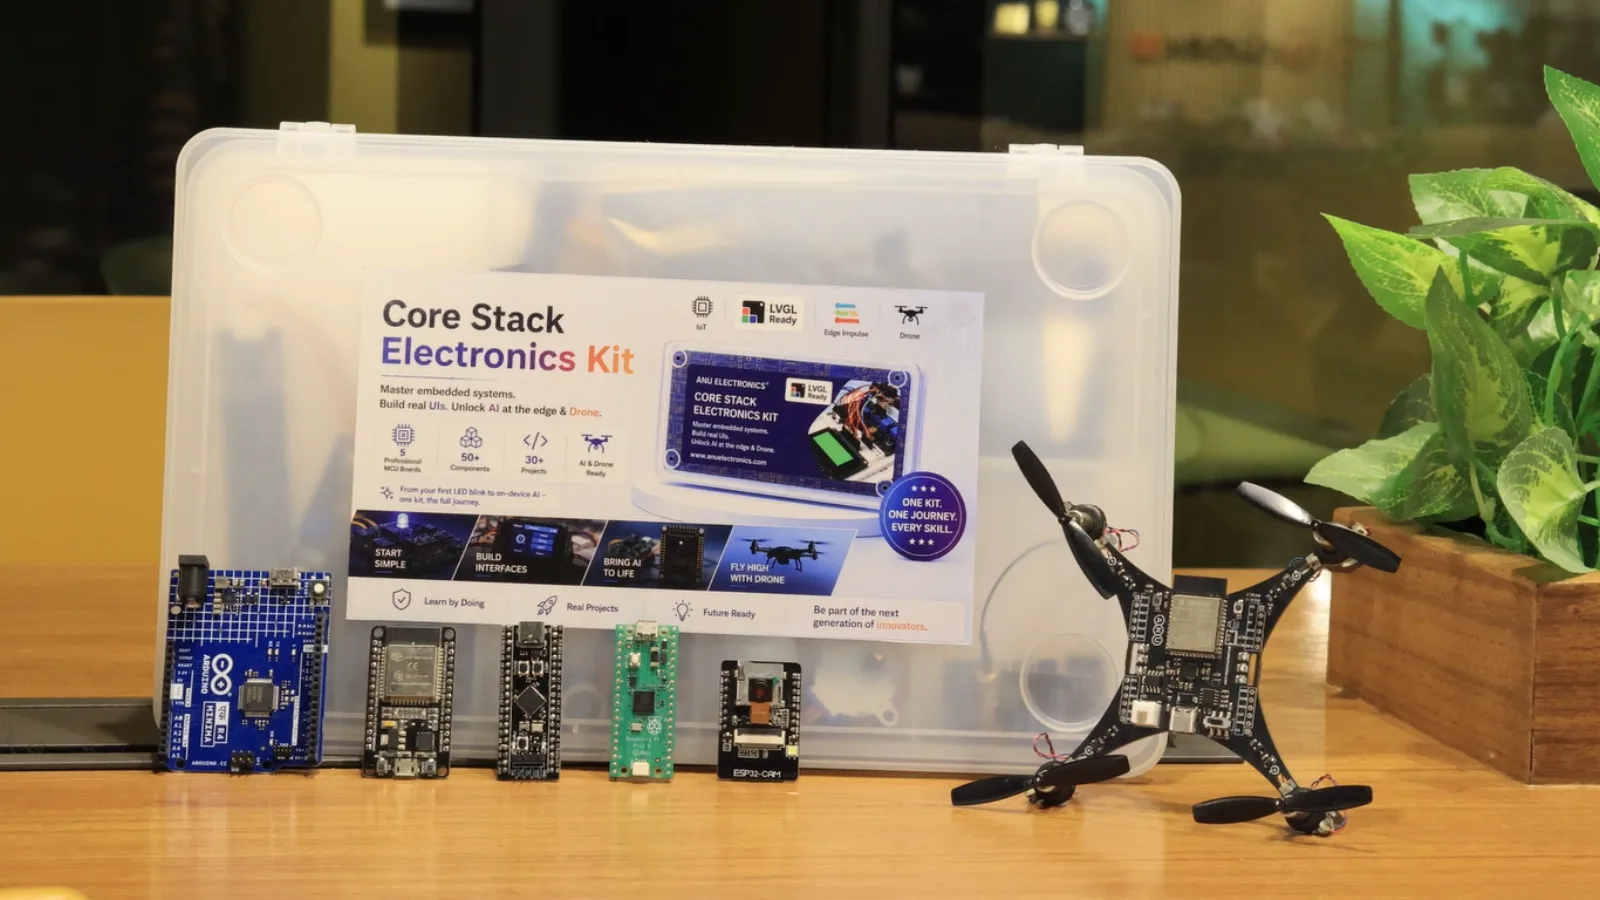
CoreStack, from ANU Electronics, teaches the sensors first and the screen after. It ships five boards, an Arduino Uno R4 WiFi, a Raspberry Pi Pico 2, the CYD display board, an ESP32-CAM, and an STM32 Nucleo-F446RE, alongside a custom PCB drone the student assembles and codes.
The curriculum runs as a five-stage journey. Stage one covers the five boards one at a time. Stage two is industrial communication: CAN, RS485, multi-board UART and I2C, RF, Bluetooth, and among them a WiFi sensor dashboard. Real readings, several boards talking to each other, and no display anywhere in the stage.
Stage three is UI With LVGL, and it is where the screen arrives, on the CYD board.
Eight projects fill the stage: Hello Touch, Live Sensor Gauge, Data Logger Chart, Smart Home Control Panel, Wi-Fi Weather Station, Motor Speed Controller HMI, IoT Dashboard with MQTT, and Settings & Multi-Screen App.
Every one of them puts a real reading behind the interface, and the data comes from the boards the student has already worked through.

Students learn to read a sensor and, separately, to draw a screen, but real products need both working together. With LVGL on the CYD board, CoreStack lets them build the complete device, from raw sensor data to a polished interface. We use LVGL in our own IVF lab monitoring products, so students learn the same tools we build with.

CoreStack is LVGL Ready, which for a buyer means the display works when the box is opened. LVGL v9 is already running on the CYD board through Arduino and TFT_eSPI, a demo is pre-flashed, and ANU Electronics has committed to keeping that path working. The first session goes on widgets and layout instead of on display configuration.
Getting CoreStack#
CoreStack is live on Kickstarter, starting at $99. That covers the five boards, the display, the PCB drone, the component set, and the CoreStack Learning Platform: text tutorials, wiring diagrams, datasheets, an MIT-licensed GitHub repository, and a video course covering the LVGL projects.
Back CoreStack on Kickstarter
The kit, the drone, and the five-stage curriculum that puts the interface where it teaches the most.
From $99