

RX Family
Build, flash, and debug the ready-to-use LVGL project of the RX72N Envision Kit with e² studio, the Smart Configurator, and the RXv3 toolchain.
Supported boards in the RX Family:
- RX72N Envision Kit
Run the Project
Install e² studio: The official IDE of Renesas is called e² studio. Because it's Eclipse-based, it runs on Windows, Linux, and Mac as well. It can be downloaded here.
Install the debugger driver: Download and install the required driver for the debugger:
- for Windows: 64 bit here and 32 bit here
- for Linux: here
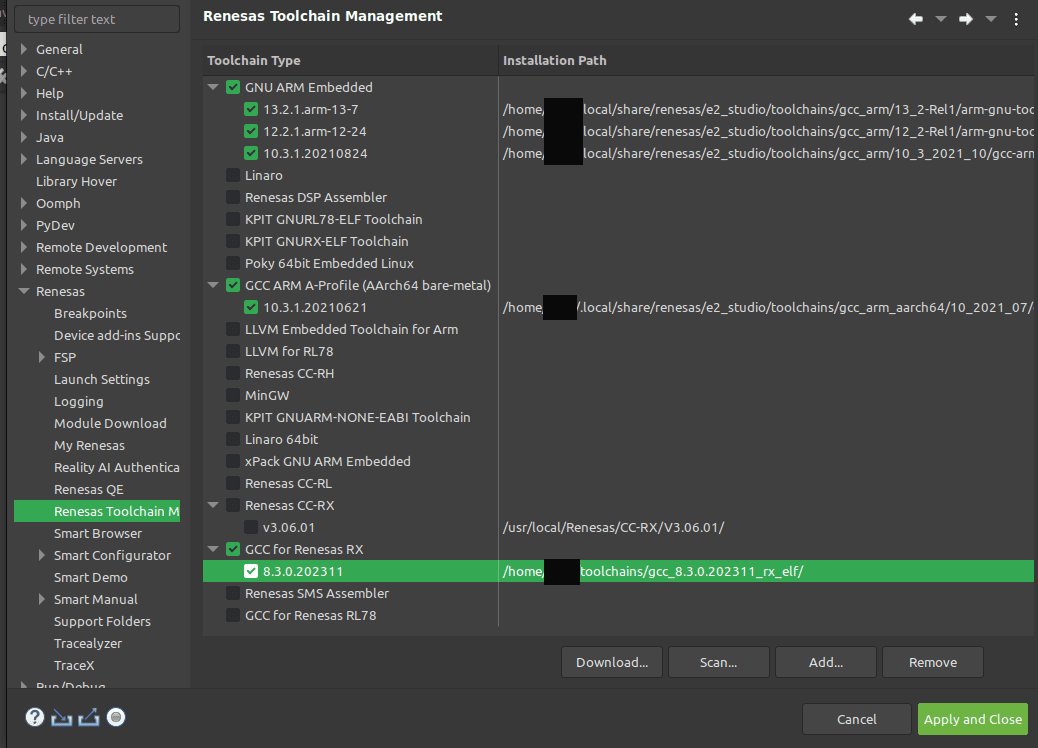
Install the RXv3 toolchain: RX72 requires an external compiler for the RXv3 core. A free and open-source version is available here after registration.
The compiler must be activated in e² studio:
- Go to
Help->Add Renesas Toolchains - Press the
Add...button - Select the installation folder of the toolchain
Clone the project: Clone the ready-to-use lv_port_renesas_rx72n-envision-kit repository:
git clone https://github.com/lvgl/lv_port_renesas_rx72n-envision-kit.git --recurse-submodulesDownloading the .zip from GitHub doesn't work as it doesn't download the submodules.
Import the project: Open e² studio, go to File -> Import project and select
General / Existing projects into workspace. Select the cloned folder and press Finish.
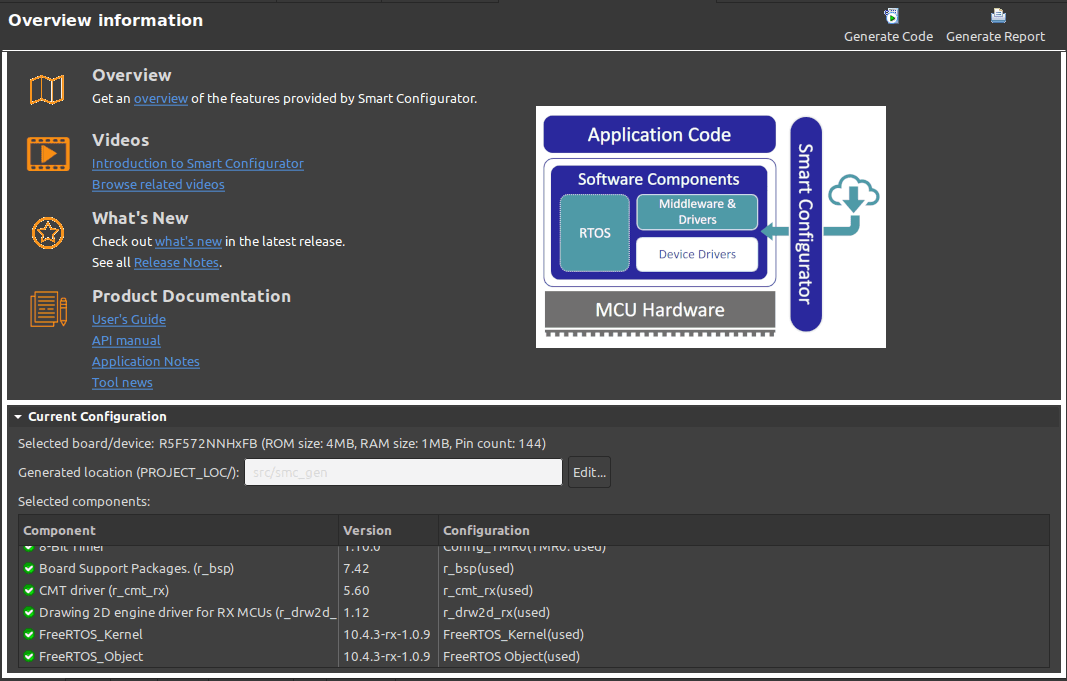
Generate the code: Double-click on RX72N_EnVision_LVGL.scfg to activate the
Configuration Window.
Renesas' Smart Configurator (SMC) includes BSP and HAL layer support extended with multiple RTOS variants and other middleware stacks. The components will be available via code generation, including the entry point of the application.
Press Generate Code in the top right corner.
Build the project: Press Ctrl + Alt + B.
Start debugging: Click the Debug button.
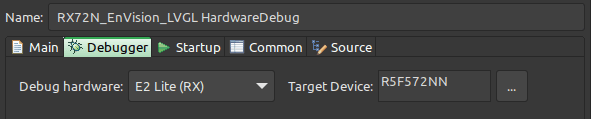
If prompted with Debug Configurations, on the Debugger tab select E2 Lite as
Debug hardware and R5F572NN as Target Device:
Make sure that both channels of the SW1 DIP switch (next to ECN1) are OFF.
Modify the Project
Open a demo
The entry point of the main task is contained in src/LVGL_thread_entry.c.
You can disable the LVGL demos (or just comment them out) and call some
lv_example_...() functions, or add your own custom code.
Configuration
src/lv_conf.h contains the most important settings for LVGL. Namely:
LV_COLOR_FORMAT_DEFAULTto set the color format LVGL renders inLV_MEM_SIZEto set the maximum RAM available to LVGLLV_USE_DRAW_DAVE2Dto enable the Dave2D GPU
Hardware and software components can be modified in a visual way using the
Configuration Window.
Support
In case of any problems or questions open an issue in the corresponding repository.
Last updated on